Como gerenciar as opções de produtos
Configure opções de produto como tamanho, cor ou material para que os clientes personalizem os pedidos antes de adicionar ao carrinho.
Having filters to help with product searches is a very convenient strategy to create a better browsing experience for your customers. As the quantity of products grows in your store, the filters become more necessary to help your customers narrow down and refine their searches.
In order to access the functionality of product filters, it is necessary to be subscribed to the Premium or above Plan.
The product search filters in your virtual store are generated from 2 elements:
1. Product Options (“Option” type):
Product Options are the ones that allow you to generate product variants such as size, color, measurements, etc. You create them on the product page. In order for the Product Options to be available in the Product Filter section, they must be of the “Option” type (note that the Product Options of the “Text Input”, “Text Area” and “File” are not considered as a Product Filter).
For everything to work correctly keep in mind that the product options that give way to the variants once created, must be called exactly the same in all products that you wish to define the variant. If in the first product it was created as “Sizes” for example, it must be called exactly “Sizes” for the rest of the products.

Learn more about product options.
2. Custom Fields (“Select List” type):
Custom fields allow you to assign characteristics such as brand, aroma, season… That is, any product characteristic that helps to group them, but do not create a variation of that product. For example, a product can have several sizes (variants) but not several brands (custom field). A perfume can have several presentations (variants) but it will belong to a single aroma (custom field).
Custom fields are created on the product page. In order for these to be available in the Product Filter section, they must be of the “Select List” type (note that Custom Fields of the “Text Area” type will not be considered as a Product Filter).
Once the custom field is created, it can be selected from the custom fields drop-down list for the rest of the products.

Learn more about custom fields.
Every time you create a new Product Option (“Option” type) or a new Custom Field (“Select List” type) in some product, these attributes will be saved as filters and will be visible in the list of available filters in your Admin Panel > Products > Filters.
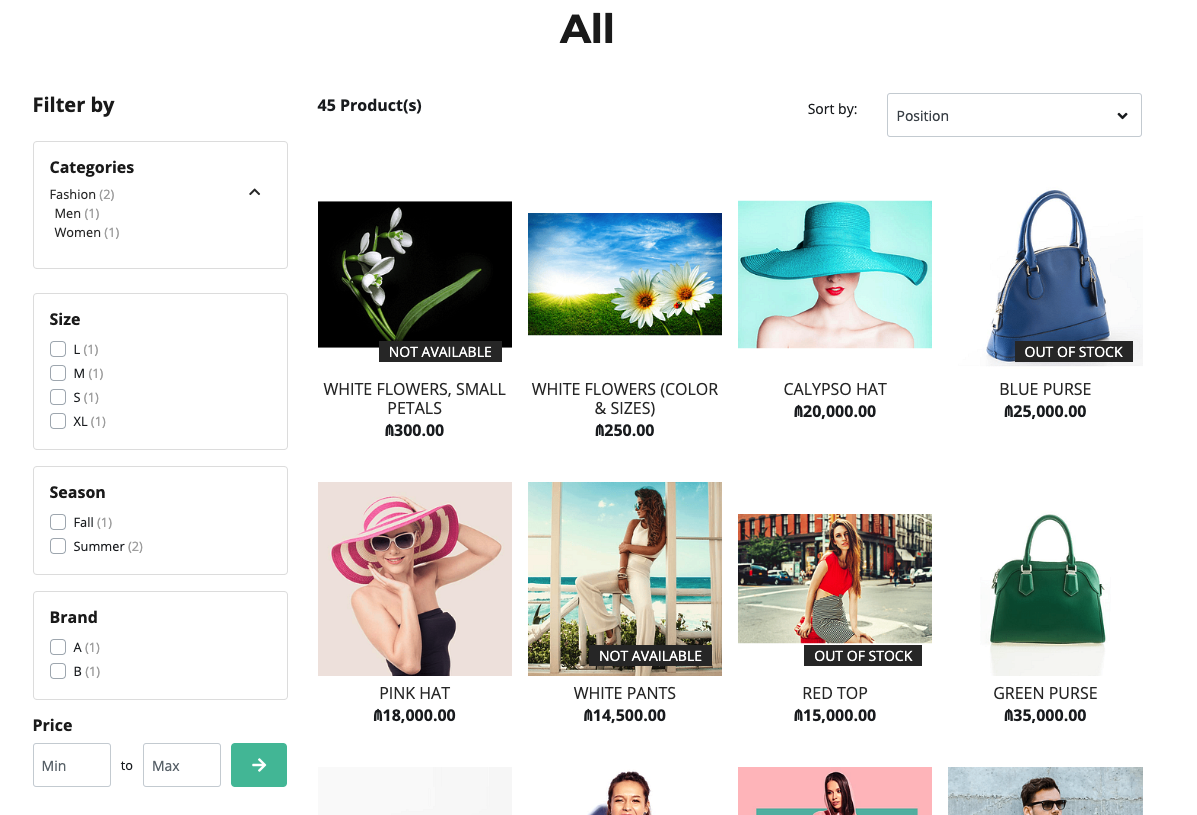
In design themes, filters will always appear in a column to the left of the content. You can rearrange the order in which your filters appear in your online store’s filter list via your Admin Panel.
To change the order of the filters, simply dragg them to the desired position:
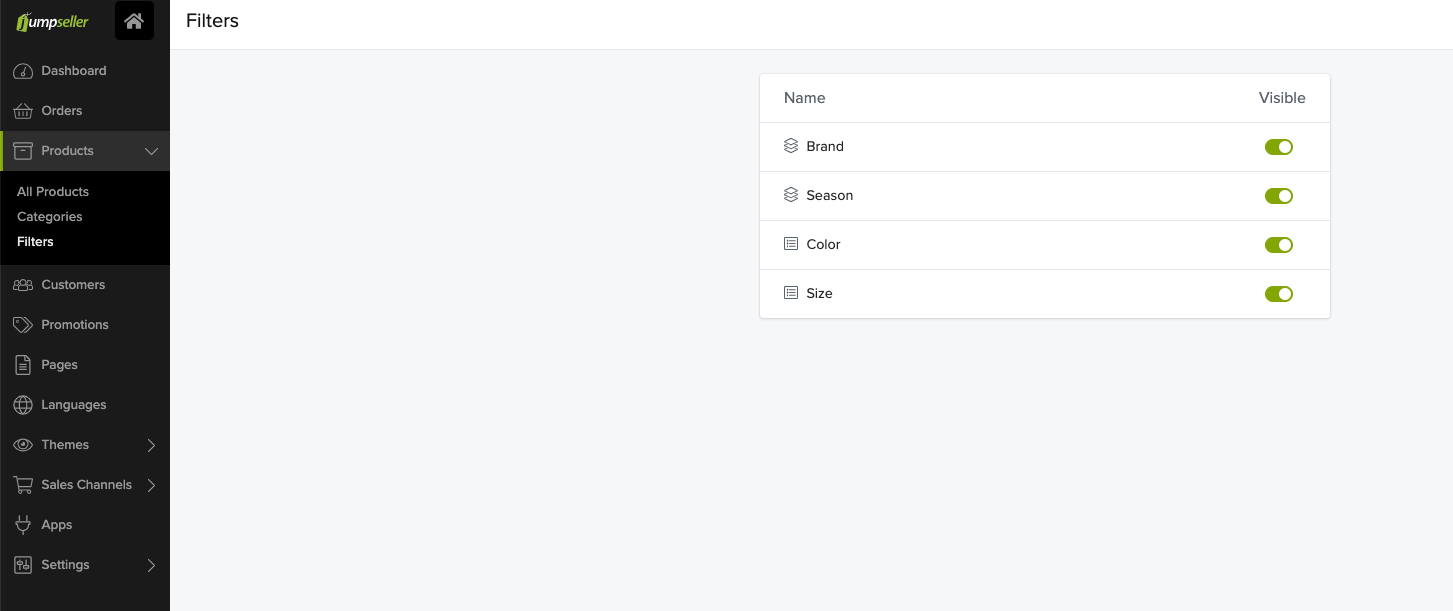
The order in the filter list in your Admin Panel:
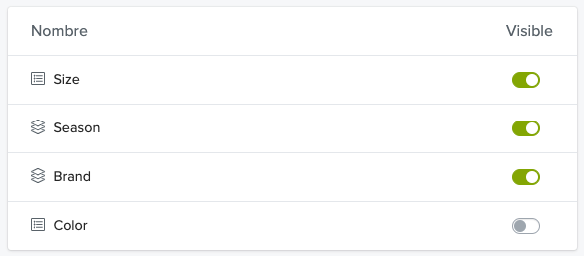
Corresponds to the order of filters that is visible in your online store:
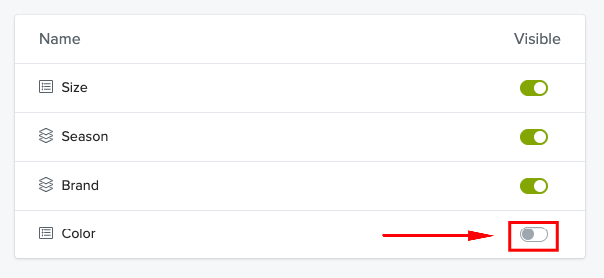
It is possible to activate and deactivate the Filters to be shown in your online store, through the toggle. In your Admin Panel > Products > Filters, the filters whose toggle is in green are those that will be visible in your online store.
Notice in the two previous images, how the “Color” filter does not appear in the online store image, since its toggle is deactivated (that is, it is not in green).
If your store was created before 2020 and you are already subscribed to the Premium plan or higher, the steps you must follow in order to incorporate the functionality into your online store will vary depending on your situation:
If your store does not have modifications or design customizations: you just need to reinstall the design theme you are using in your store so that you have the updated version. To do this, in your Administration Panel > Themes > Gallery, you must go down to the “Gallery” section and click on the “Install” button corresponding to your current theme. Remember that this action will cause the theme to be installed again, so you will need to configure the theme options again, such as colors, banners, sliders, etc.
If you have design customizations in your theme: you should write to our support so that your store is analyzed and the team can make the necessary changes so that the functionality is incorporated without losing the customizations that already exist in your theme. If you don’t want to invest more in the current theme, you can use the first option and reinstall the theme from scratch.
If you need more help, feel free to contact us.
Start your free 7-day trial. No credit card required.
