Support Center

Verify a domain for Google Services

The methods demonstrated in this article are performed using Google Search Console.

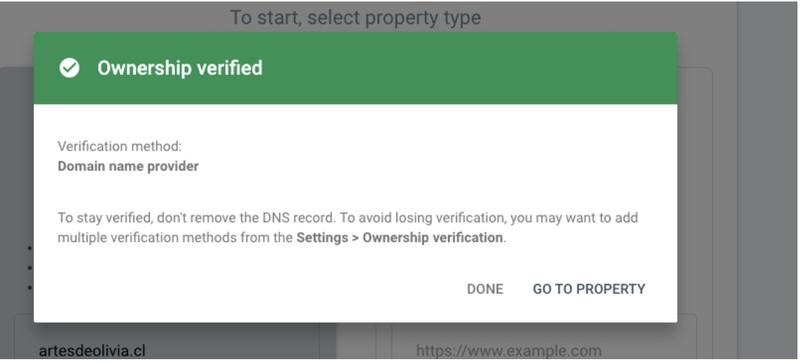
It may take up to 72 hours for Google to recognize your domain as verified!


Domain Ownership

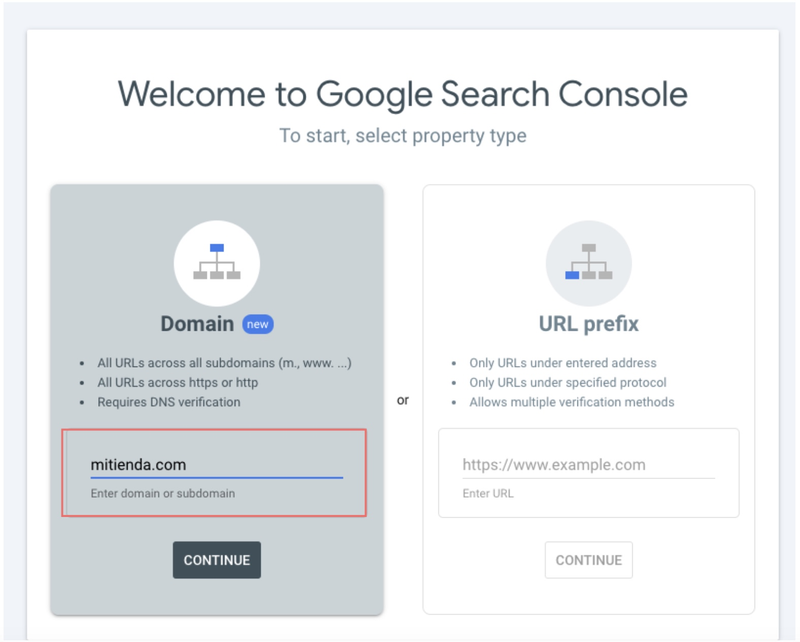
Start by going to Google Search Console and selecting “Domain”, writing down your domain URL, and clicking “Continue”.

google analytics report

TXT record

Note: Use the provider where you bought & configured your domain. In this case, we are using the other options as we want to use the unlisted provider called aws.

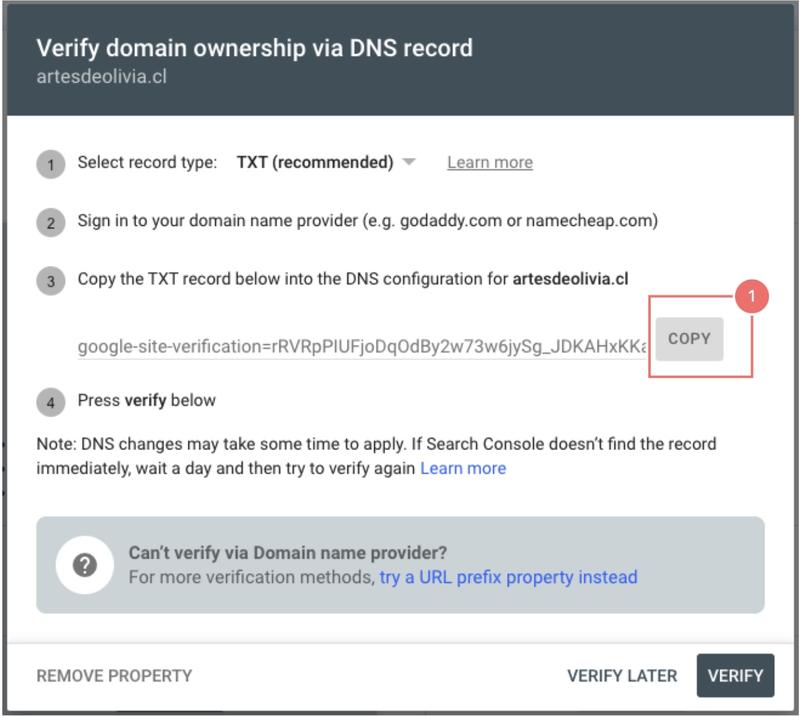
  1. On the Google Search Console, select the record type as “TXT (recommended)

    google analytics report
  2. If you configured your domain with Jumpseller you can simply go to the Admin Panel > Settings > Domains and access the Advanced DNS Configuration section. If not, continue with the same steps for your selected domain provider.

  3. Add the TXT record to the DNS configuration for a domain. For that, you will have to select the TXT in the record select box and paste the TXT record to the Data text area.

    google analytics report
  4. Finally, click “Add”, you should see the created record on the above list.

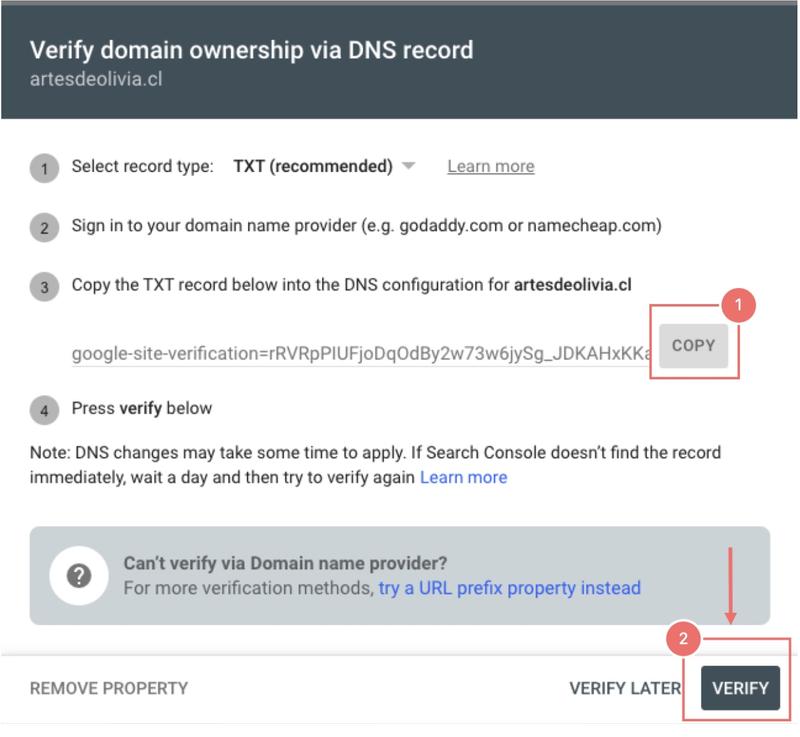
  5. After waiting for 1 hour, go back to the Google Search Console and click on “Verify” to finish the process.

CNAME record

Note: Use the provider where you bought & configured your domain. In this case, we are using the other options as we want to use the not listed provider called aws.

  1. On the Google Search Console, select the record type as “CNAME”

    google analytics report
  2. Again, if you configured your domain with Jumpseller you can simply go to the Admin Panel > Settings > Domains and access the Advanced DNS Configuration section. If not, continue with the same steps for your selected domain provider.

  3. Add the CNAME record to the DNS configuration for a domain. Paste the CNAME Label to the Data text area.

    google analytics report
  4. Finally, click “Add”, you should see the created record on the above list.

  5. After waiting for 1 hour, go back to the Google Search Console and click on “Verify” to finish the process.


URL Ownership

Start by going to Google Search Console and selecting “URL Prefix”, writing down your URL, and clicking “Continue”.

google analytics report

Meta tag

This method is recommended by Jumpseller.

  1. On the “Other verification methods” section, click “HTML tag”.

    google analytics report
  2. Next, you need to Copy the meta tag and paste it into your site’s home page. Go to the Admin Panel of your Online Store and then to Themes > Code Editor and click on Layout. Paste the Meta Tag here. It should go in the < head > section, before the first < body > section.

    google analytics report google analytics report
  3. Click on Save Changes. After waiting for 1 hour, go back to the Google Search Console and click on “Verify” to finish the process.

Google Analytics

  1. Go to the Google Analytics Page where you can Sign In (or create an account for your business).

  2. You can set up Google Analytics for a website and a Mobile app. For this, we will focus on the website. After signing in, just fill out the fields.

    google analytics report
  3. Then you need to find your Tracking ID. Go to your Google Analytics dashboard and click on Admin and then on Data Streams. Select the one you created before and copy the Measurement ID.

    google analytics report google analytics report
  4. Go to your Admin panel, and from the sidebar go to Settings > General. If you scroll down a little you will come across the following:

    google analytics report
  5. Paste the Tracking ID, Save, and, after waiting for 1 hour, go back to the Google Search Console and click on “Verify” to finish the process.

Google Tag Manager

You can use the Google Tag Manager app integrated with Jumpseller to verify your domain.

  1. Install the app by going to your store’s admin panel, and clicking on “Apps” on the sidebar and then go to Gallery. Click on the Google Tag Manager app.

  2. After the installation is complete, click on the App to run it, you will be asked to insert your Tag Manager ID number. In order to get that number you need to sign up to Tag Manager and fill out the information required.

    google analytics report
  3. Because of the Jumpseller integration with the Google Tag Manager App, you can ignore the following message:

    google analytics report
  4. Copy your Container ID number, paste it in the box where it says “Your Tag Manager ID” and click “Save Now”.

    google analytics report google analytics report
  5. After waiting for 1 hour, go back to the Google Search Console and click on “Verify” to finish the process.

For more information about verifying a domain using Google Webmasters Tool, please visit Google’s documentation


For up-to-date information on the status of our system and all its services, please visit status.jumpseller.com. You can also subscribe to receive notifications about any updates or maintenance work on the site.

Start selling in Google Commerce with Jumpseller

Free trial for 14 days. No credit card required.