Setting up a Corporate Email
A personalized email is inexpensive and easy to get. By using email hosting softwares such as Zoho, Google Workspace, Office 365, and Fastmail, you...
This guide will show you how to configure your Google Workspace account, which offers your business custom professional email, secure video conferencing, shared calendars, online document editing, and much more. You can have up to 300 users with business editions of Gmail, online documents, Drive storage, Calendar, Meet video conferencing, and other office apps.
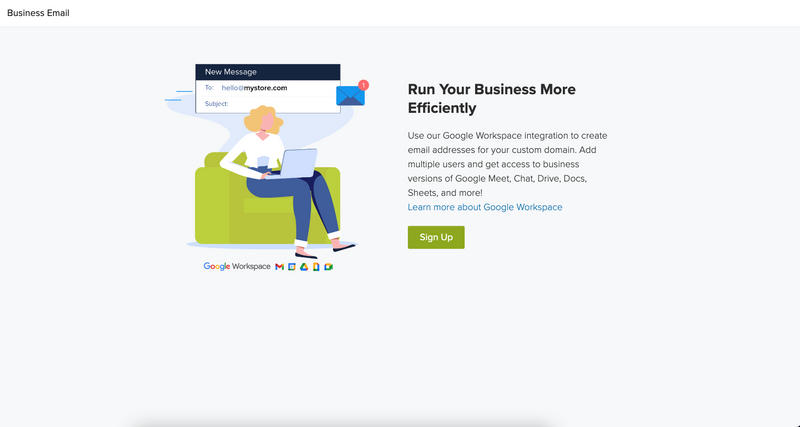
The sign up page is the first page you will see when opening the Google Workspace page, if you have a valid domain to create a Google Workspace account the “Sign Up” button in green will appear, press it to go to the plan selection page.
Here you can select which plan you prefer, based on the cost per user and the benefits provided by it.
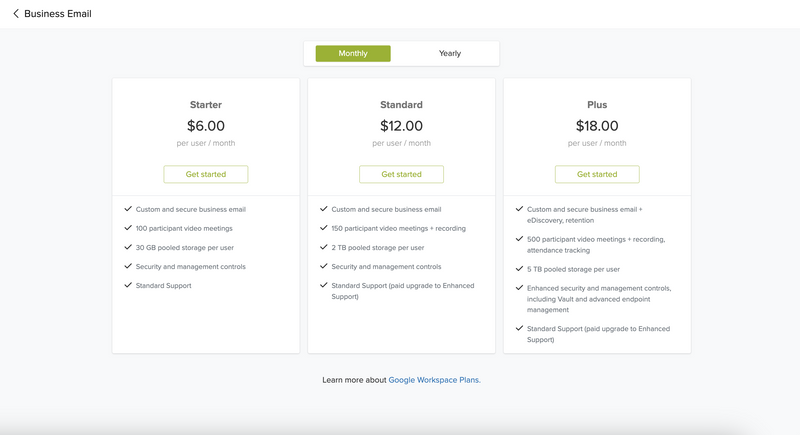
*Be aware that Google can change these prices. Business Domain in the admin section is where you should see the correct final price.
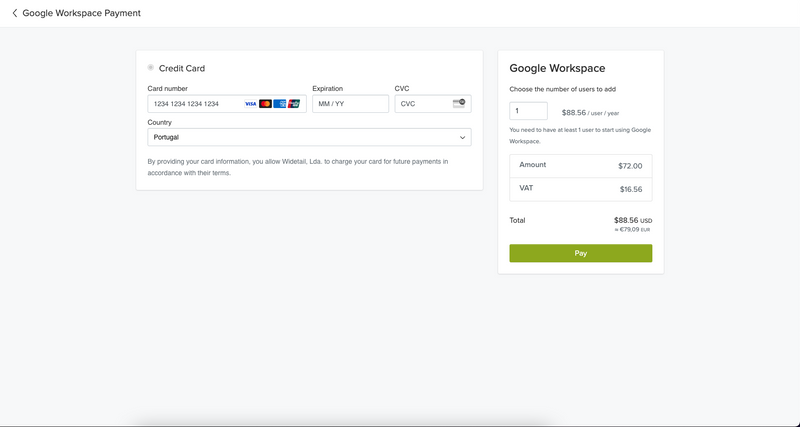
Once on the billing page, you can choose the number of licenses you want to purchase on this page. Licenses work like seats for your users, you always have to purchase a license to give to a user. You need to have at least 1 user to create a Google Workspace account. Currently this purchase can only be done using a credit card.
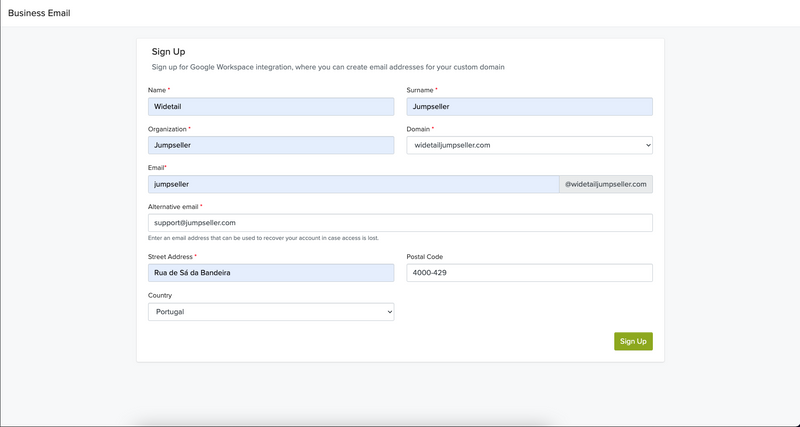
After you successfully complete your purchase you will be able to create the account. Fill in the information for your account:
After signing up check the inbox for the email address (Alternate email) you used to sign up for Google Workspace and look for an email similar to the following one:
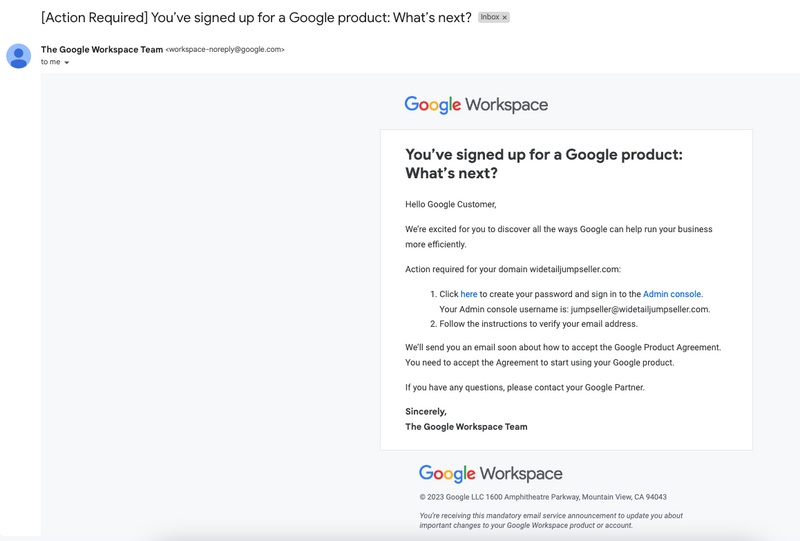
Follow the actions required in the email, create your own password for your account and accept the Terms of Service.
After signing up you will be redirected to the Manage Account page, like the name suggests this is the place where you will manage every area of your Google Workspace account.
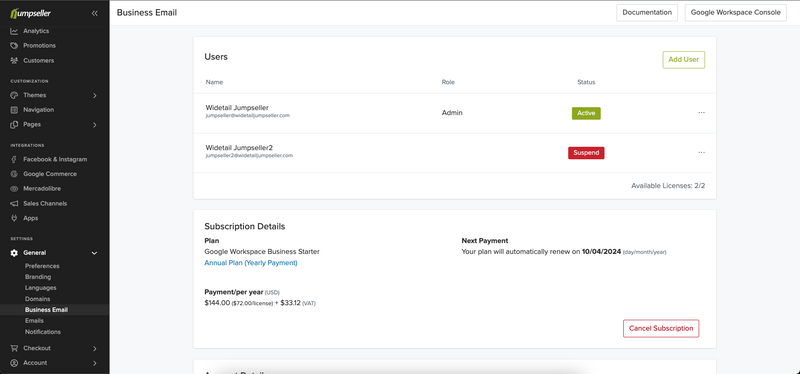
This page is composed of a header and 3 sections: the Users section, the Subscription Details section and the Account Details section.

Documentation button
Redirects you to this documentation.
Google Workspace Console button
Opens a new tab in the Google Partner Sales Console corresponding to the customer’s account where you can:

On the top right of this section there is a button that will take you to the add user page where you are able to add another user to your Google Workspace account.
Each user has:


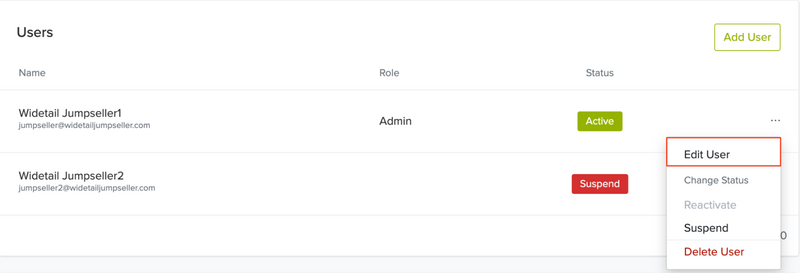
To open the action menu of an user press the 3 dots on the right side of the user:

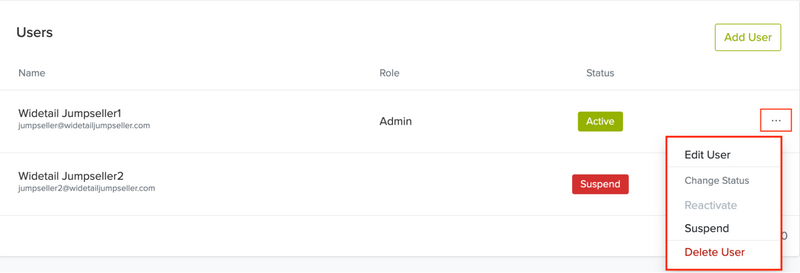
You can edit the user information, change the user status (suspend or reactivate) and delete a user within this action menu. At the bottom right of this section you have your current number of used licenses and the total number of licenses you have available.
This section has the plan payment information, how much you are currently paying annually and your renovation date. If you don’t want to renew the Google Workspace account cancel the subscription before the date of the next payment.

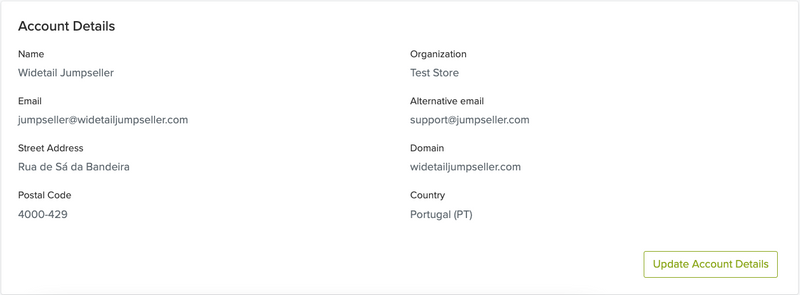
Update account details
Open the edit customer page with the fields already filled with your customer information that is displayed in the account details, you can change all fields except the domain and the country field.
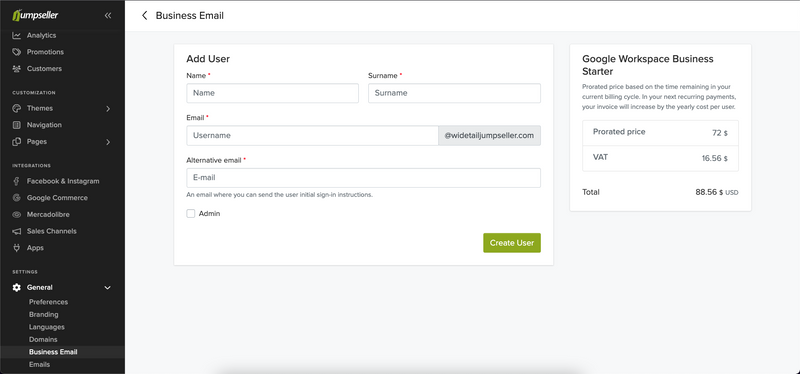
You can add up to 300 users to your Google Workspace account. To add a new user and send an email invitation for your Google Workspace account, fill out the following fields and click create user.
On the right side of the page there is information about the additional cost of adding a new user.
A deleted user can’t access any of your organization’s Google Workspace services, and the system deletes their data.
Deleting a user won’t reduce the number of your organization’s licenses and won’t affect your billing. You can reassign the license to a new user.
You agree to pay for the number of user licenses you choose when you set up your yearly contract for a full year of service. When it comes time to renew your contract, you may remove any licenses you no longer use and reduce the cost of the next yearly contract.
Ensure that you must remove the user:
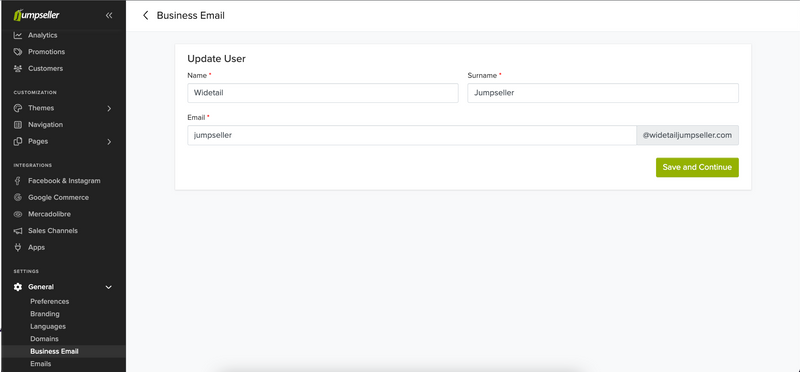
You can edit an user Name, Surname or username.
Access this page through the user actions menu in the users table.
Clicking the button “Edit User” in this action menu will open the edit user page with the information of that user filled, change the information you want and click the “Save and Continue” button.
To edit information about your Google Workspace account go to “Update Account Details” button in your Account Details section. This section is similar to the sign up section but the domain and country fields are locked and the remaining fields are already filled with the customer info.
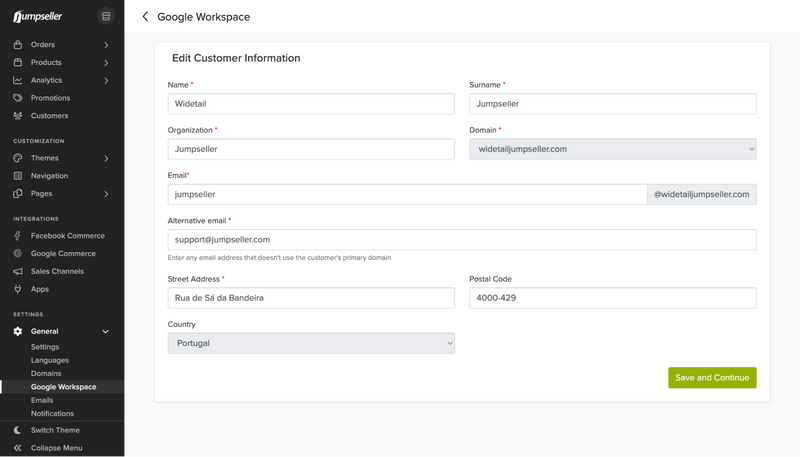
Fill out the changes you want to perform and click the “Save and Continue” button.
All Google Workspace memberships renew automatically by default to avoid service disruptions. As long as the payment method you have on file is still active, you don’t need to take any more steps to renew your membership.
We renew your annual commitment for the amount of user accounts you have on the day your contract is due to renew. Your payment decreases when we remove any licenses that you are currently not using in your commitment.
You’re charged 15 days before your renewal date. We send an email reminder 30 days before your renewal date to give you time to update your credit card information or disable the renewal.
To change your Google Workspace plan or billing cycle (monthly or annual), contact us so we can make the change for you manually.
To transfer your account to Jumpseller, please follow the steps below:
Once you have completed these steps, please let us know so we can finalize the transfer. Additionally, could you tell us which plan you chose when creating your Google account (Starter, Standard or Plus) and if the payment is monthly or annual.
If you have any questions, please contact us.
Start your free 7-day trial. No credit card required.